From Old Tee to Tail Wags: Upcycling Fun for Blackie (and Your Pup!)
Ever look at that towering pile of old t-shirts lurking in your closet, destined for the donation bin or, even worse, the landfill? You know the ones – that faded concert tee from a decade ago, the slightly-too-small gym shirt, or the perfectly good but out-of-style top. My Blackie, bless his big, goofy heart, goes through toys faster than I can say "treat!" Seriously, it's like he has a built-in toy shredder. He loves a good tug-of-war more than anything, but those store-bought ropes and plushies just don't stand a chance against his enthusiasm.It got me thinking about the never-ending cycle of buying, destroying, and replacing dog toys. Not only does it hit the wallet pretty hard, but it also creates a lot of unnecessary waste. We're always trying to be more mindful of our environmental pawprint around here, and I knew there had to be a better way to keep Blackie entertained without constantly adding to the trash heap or emptying my bank account.
That's when I had an epiphany – inspired by a little bit of internet scrolling and a lot of Blackie's insistent nudges for playtime. What if those old t-shirts, instead of becoming forgotten fabric, could be transformed into something Blackie would absolutely adore? The answer, my friends, is a resounding yes! Upcycling old t-shirts into durable, fun, and completely free tug toys has been a game-changer in our household.
In this post, I'm going to walk you through exactly how to take those forgotten tees and easily transform them into Blackie-approved playthings that your own pup will go wild for. Get ready to flex your DIY muscles, save some money, and make your furry friend's day! Ready to make your pup's day and save some green? Let's get started!
Why Bother? The Paws-itive Benefits of Upcycling (and Blackie's Approval!)
You might be thinking, "Is it really worth the effort?" And my answer is a resounding, tail-wagging yes! The benefits of upcycling old clothes into dog toys are numerous, extending far beyond just having something for your dog to chew on.First up, let's talk about the incredible **Cost-Effectiveness**. This is a zero-cost project, my friends! You're using materials you already have lying around, effectively turning what would be waste into a valuable resource for your dog. Your wallet, and more importantly, Blackie's treat budget, will absolutely thank you. Instead of spending ten dollars on a toy that might last an hour, you're creating something equally fun for free.
Then there's the wonderful **Eco-Friendliness**. Every t-shirt you repurpose means one less item heading to a landfill. The textile industry creates a surprising amount of waste, and by giving old clothes a second, vibrant life as a toy, you're actively reducing your household's carbon pawprint. It feels incredibly good to know that Blackie's playtime is also helping the planet.
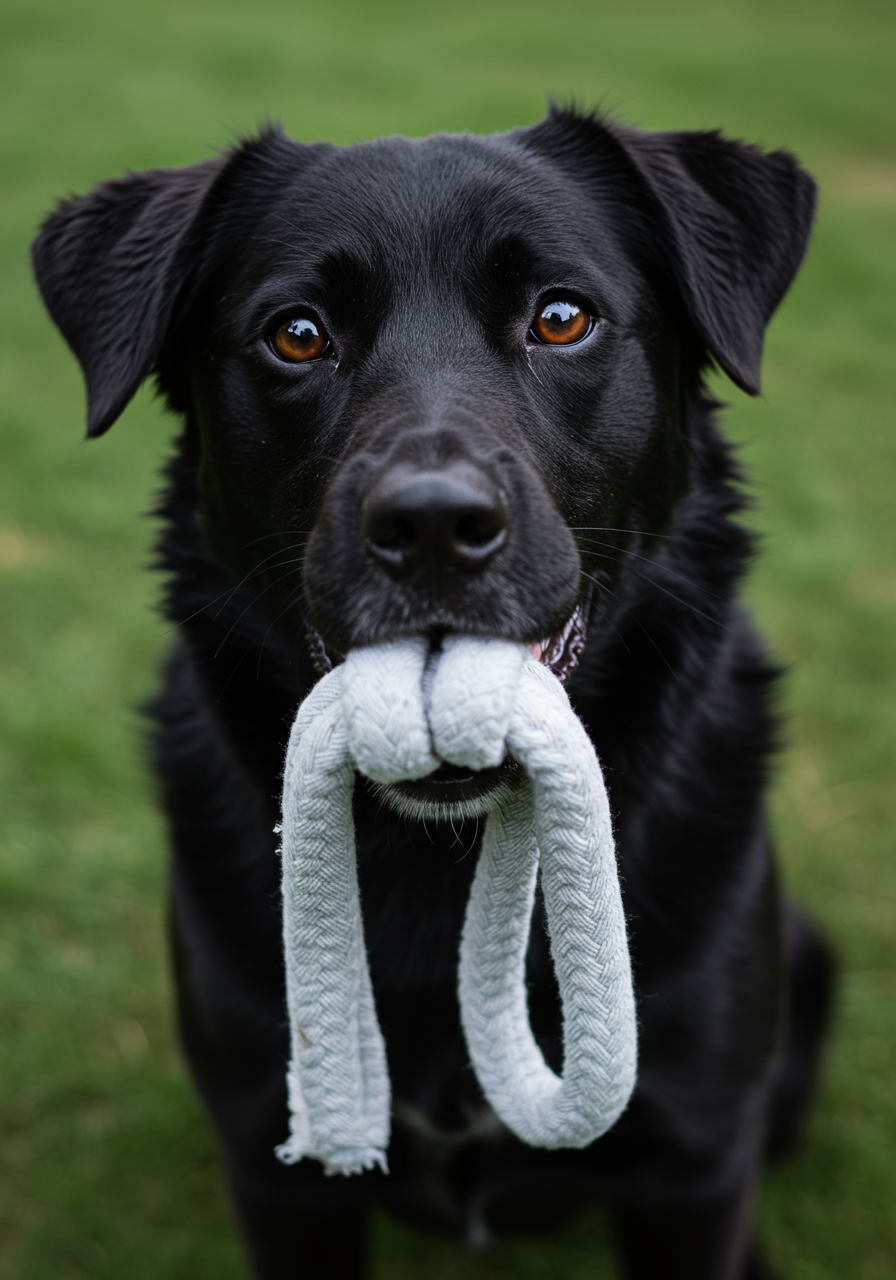
These toys are also incredibly **Customizable**. You can make them any size, length, and color combination imaginable to perfectly suit your dog's size and your personal style. Blackie absolutely loves his multi-color ones – they’re so vibrant and fun, especially when we’re playing outside in the park. You can match them to your dog's collar, or just go wild with clashing patterns! The possibilities are endless.
And here's a surprising benefit: they are **Durable (Surprisingly!)**. Believe it or not, tightly braided cotton t-shirt material holds up surprisingly well against intense tugging and even some serious chewing. In my experience, they often outlast many of the cheaper, mass-produced store-bought toys that seem to unravel after just a few play sessions. The elasticity of the jersey knit fabric, when braided tightly, creates a very strong and resilient structure.
Plus, you get the peace of mind knowing you're using **Safe and Known Materials**. You know exactly what's in the toy – just soft, washed cotton. There are no mystery plastics, no potentially harmful dyes (especially if you're using well-worn, washed shirts), and no strange chemical smells. This is a huge win for any pet parent concerned about what their furry friend is putting in their mouth.
Finally, there's the unspoken but powerful benefit of the **Bonding Experience**. Not only is the process of making the toy a fun, creative outlet for you, but playing with a toy you crafted yourself adds an extra layer of joy to playtime. Blackie seems to know when I've made something special for him; he gets an extra sparkle in his eye, and our tug sessions feel even more connected. It's a wonderful way to invest a little bit of your time and love directly into an activity you share with your dog.
Gather Your Supplies: What You'll Need (The Essentials)
Alright, before we dive into the fun part, let's make sure you have everything you need. The beauty of this project is how few supplies are required, and chances are, you already have most of them lying around your house!First and foremost, you'll need **Old T-shirts**. For the best results, aim for 100% cotton shirts. Jersey knit cotton is wonderfully soft, durable, and doesn't unravel easily, making it perfect for this project. Avoid anything with hard embellishments like buttons, zippers, snaps, or sequins – these can be choking hazards or cause injury during play. Also, steer clear of shirts that are overly thin or made of very stretchy, synthetic materials, as they might not hold up as well. The more fabric you have, the thicker and more substantial your toy can be.
**Tip from Blackie:**
Ask your humans for their old band tees – they smell like them and make for the best cuddle companions after a good play session! He's a fan of anything that retains my scent.
Next, you'll need a good pair of **Sharp Scissors**. This is crucial! A sharp pair of fabric scissors will make cutting through t-shirt material a breeze, resulting in cleaner, more consistent strips. Dull scissors will frustrate you and might lead to jagged edges.
A **Ruler or Measuring Tape** is optional but highly recommended. While you can eyeball your strips, using a ruler helps ensure consistency in width, which in turn leads to a more uniform and stronger braid. If you want a really neat and professional-looking toy, grab one.
Finally, an **Elastic Rubber Band or Clip** is also optional but incredibly helpful, especially when you're just starting your braid. It can securely hold the beginning of your strips together, allowing you to focus on getting your braid tight and even without everything slipping around. You'll remove it later, so don't worry about it being part of the finished product.
That's it! Gather these simple items, and you'll be ready to transform them into a fantastic, free, and eco-friendly toy for your beloved canine companion.
Step-by-Step Guide: Let's Get Braiding! (Blackie's DIY Masterclass)
Now for the fun part – turning those old shirts into a brand new, Blackie-approved tug toy! Don't worry, even if you've never braided anything in your life, this is super easy.**Step 1: Prep Your T-Shirts.**
First things first, make sure your old t-shirts are clean and dry. This just ensures you're working with fresh material and that any lingering smells or dirt are gone. Once they're ready, lay each shirt flat and smooth it out. Now, grab your sharp scissors and cut off any hems or thick seams. This includes the bottom hem of the shirt, the neckline, and the sleeve hems. These parts are often double-stitched or reinforced, making them thicker and harder to work with and braid evenly. You want just the main body of the shirt.
**Step 2: Cut Your Strips.**
This is where your ruler can come in handy. For a standard tug toy, I typically cut the body of the t-shirt into strips approximately 1 to 2 inches wide. Make them as long as possible – usually from the armpit seam down to where you cut off the bottom hem is ideal. The longer your strips, the longer your finished toy can be without having to piece things together. The width of your strips will determine the thickness of your final toy.
**Blackie's Tip for Bigger Dogs:**
If you have a larger breed like Blackie, or a particularly strong tugger, use wider strips (2 to 3 inches) for a chunkier, more substantial, and thus more durable toy. This creates a toy with more bulk that's harder for big jaws to get a destructive grip on right away.
**For Smaller Dogs:**
If you have a smaller dog, narrower strips (1 inch or less) work great, creating a lighter, more appropriate-sized toy for their mouth and play style.
You'll need at least 6 to 12 strips depending on your desired thickness and the braiding style you choose. For a simple braid, six strips are usually a good starting point.
**Step 3: Group and Secure Your Strips.**
Once you have all your strips cut, gather them together. For a standard 3-strand braid (which is what we'll focus on as it's the easiest), you'll want to create three equal groups of strips. For example, if you cut 6 strips, you'll have 3 groups of 2 strips each. If you cut 9 strips, you'll have 3 groups of 3 strips each. Line up the top ends of your grouped strips. Now, you can either tie a very tight knot at one end to secure them, or you can use your elastic rubber band or clip to hold them together tightly. The rubber band method is great because you can remove it later for a cleaner finish.
**Step 4: The Braiding Begins! (The Fun Part!)**
This is where your new toy starts to take shape!
**Simple 3-Strand Braid:**
If you have your three groups of strips (e.g., 2 strips in each group), treat each group as one thick strand. Now, simply do a basic 3-strand braid: take the rightmost group and cross it over the middle group. Then, take the leftmost group and cross it over the new middle group. Continue this pattern, always taking the outside group and crossing it over the middle group.
**Square Knot Braid (More Advanced but Super Durable):**
For a truly robust toy, a square knot braid (also known as a cobra weave or paracord stitch) is fantastic, but it's a bit more complex than a basic braid. It typically uses two core strands and two working strands that are tied in a series of half-hitch knots around the core. If you're feeling adventurous, there are many excellent video tutorials online for "fabric square knot braid" or "t-shirt rope toy square knot." It creates a dense, strong, and visually appealing toy.
No matter which braid you choose, the key is to braid tightly. Pull each section firm as you go to ensure maximum durability. The tighter the braid, the more resilient your toy will be against enthusiastic tugging.
**Step 5: Finish It Off!**
Once you've braided to your desired length – remember to leave enough unbraided length at the end for a final knot – it's time to secure your work. Tie another very tight, secure knot at the end of the braid. Just like at the beginning, you want this knot to be robust and not come undone during intense play. I usually do a double or even triple knot for extra security. If you used a rubber band at the start, carefully remove it now and tie a final secure knot there as well. Once both ends are knotted, you can trim any excess fabric from the knots to make them look neat and tidy.
**Step 6: The Blackie Test!**
Before presenting it to your eager pup, give your newly made tug toy a good, strong tug yourself. Test both knots and the integrity of the braid. Does it feel sturdy? Does it hold up to your pulling? If it passes your personal durability test, then it's ready for the true expert. Present it to your eager pup and watch the tail wags begin! Blackie always knows when something is new and made just for him, and the excitement on his face is priceless.
Blackie's Top Tips and Toy Variations: Taking it to the Next Level
Once you get the hang of the basic tug toy, you might find yourself wanting to experiment. Blackie and I have tried a few variations that add extra fun and functionality.**Size Matters:**
As mentioned, don't be afraid to adjust the strip width and overall length of your toy to perfectly match your dog's size. A tiny chihuahua won't need a bulky toy made from 3-inch strips, and a large Labrador will make short work of something too flimsy. Tailor the toy to your dog's mouth and play style.
**Color Pop:**
My favorite trick! Mix and match different colored t-shirts for a truly vibrant and eye-catching toy. This not only makes the toy more visually appealing but also allows you to use up a wider variety of old clothes. Blackie doesn't care about the colors, but I certainly appreciate the cheerful look of a rainbow tug toy!
**Adding Interest:**
Want to make your toy even more engaging? You can braid in a small tennis ball or even a crinkly, empty plastic water bottle (just the bottle, no label, cap, or plastic ring!) into the center of your braid. The tennis ball adds weight and bounce, while the water bottle provides a satisfying crinkly sound that many dogs adore. Just ensure the added item is completely secure and can't be easily pulled out or ingested.
**Beyond the Braid:**
While braiding is excellent for tug toys, there are other simple fabric toy variations you can try:
**Simple Twist:** Take two very long strips of t-shirt fabric, knot them together at one end, then twist them tightly around each other. Knot the other end securely. This creates a simple, rope-like toy that's quick to make.
**Knotted Ball:** Cut a large circle from a t-shirt (think dinner plate size or larger, depending on your dog). Gather up some smaller fabric scraps, old socks, or even more t-shirt strips and place them in the center of your circle to form a soft "stuffing." Gather all the edges of the t-shirt circle around the stuffing and tie it very securely with a thin strip of t-shirt fabric or a robust knot, forming a fabric ball. This makes a soft fetch toy or a puzzle toy if you hide treats inside the stuffing.
**Cleaning:**
One of the best things about these fabric toys is how easy they are to clean! When Blackie's toys get a bit slobbery or dirty from outdoor play, I simply toss them in the washing machine with my regular laundry. Use a gentle cycle and let them air dry or tumble dry on low. They come out fresh and ready for more play, just like new!
Safety First, Always! (A Message from Blackie's Vet)
While homemade toys are fantastic, enjoyable, and generally safe, it's incredibly important to prioritize your dog's safety. Blackie's vet always reminds me that supervision is key with any toy, especially something new or homemade.**Supervise Play:**
Always, always supervise your dog when they are playing with any toy, particularly new ones or fabric toys that can potentially unravel. Even the most durable homemade toy can eventually succumb to determined chewing. It's crucial to be present and watchful.
**Inspect Regularly:**
Before and after each play session, take a moment to carefully inspect the toy. Look for any signs of fraying, loose pieces, tears, or damage to the knots. Over time, even tightly braided fabric can start to loosen up or develop weak spots.
**Remove When Damaged:**
This is perhaps the most important rule. If the toy starts to unravel, if your dog is tearing off pieces, or if you see them ingesting any of the fabric strands, take the toy away immediately. Fabric can cause intestinal blockages if swallowed, which can be very dangerous. It's always better to be safe than to face a veterinary emergency. If a toy shows signs of damage, it's time to retire it.
**Choose Wisely:**
Stick to 100% cotton or other natural fibers for your toys. Avoid any shirts with hard plastic elements, metal, glitter, or dyes that could potentially be toxic (though old, well-washed shirts are generally fine as any loose dye would have washed out long ago). The simpler the material, the safer it usually is.
**Right Size:**
Ensure the toy you make is an appropriate size for your dog. A toy that is too small can pose a choking hazard, while one that is too large might be awkward for your dog to play with. Consider your dog's breed, jaw size, and chewing habits when determining the toy's final dimensions.
Conclusion: Happy Tugging, Happy Tails!
There you have it, friends! A simple, fun, and incredibly rewarding way to turn your old, forgotten t-shirts into fantastic, Blackie-approved tug toys. We've talked about all the wonderful benefits – how they're absolutely free, wonderfully eco-friendly, endlessly customizable, surprisingly durable, and made from materials you know and trust. But perhaps most importantly, they offer a truly special way to bond with your beloved dog.Seeing Blackie run around with a vibrant, handmade tug toy that I crafted just for him, knowing I saved some money and helped the environment in the process, is a feeling money simply cannot buy. His enthusiastic tail wags and joyful tugging sessions are all the reward I need. It’s a small act that brings so much happiness to both of us.
So, next time you're clearing out your closet and come across those old tees that have seen better days, don't just toss them. Think "tug toy!" Give this DIY project a try, and I promise you and your pup will be so glad you did. It's amazing what a little creativity and a pile of old fabric can do.
I'd absolutely love to see what you create! Share your pup's new favorite upcycled toy with me in the comments below, or tag me on social media if you post pictures. Let's spread the joy of handmade dog toys!
Happy tugging, friends! Woof-fully yours, Blackie's Owner
Comments
Post a Comment